Importing Users
As a School Admin, you can import multiple users on the User Management page. You can also create a single user.
When users are imported, they will not receive an email invitation to activate their account. The accounts will become active immediately.
1. In the upper right hand corner, click Add User > Import Users.
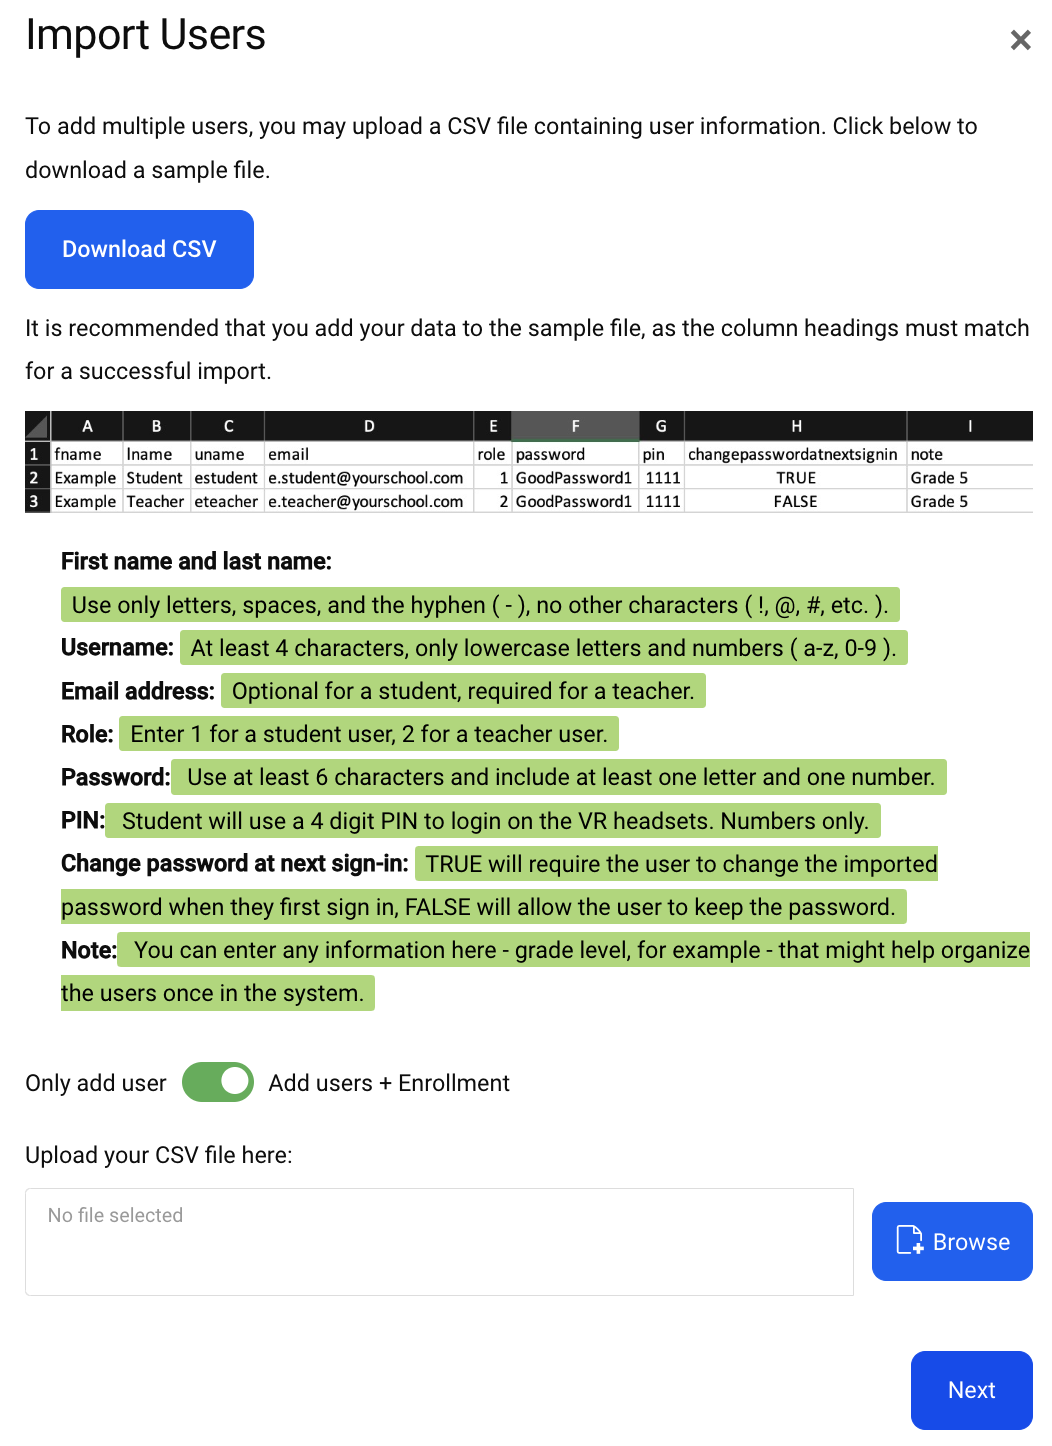
2. Click the Download CSV button for a sample CSV file.
3. Prepare your CSV file. It is best to add your data to the sample file, as the field headers must match precisely for a successful import.
Each user will require a username and password and students will require a PIN for logging into the VR headsets. If you would like to force users to change their passwords when they first sign in, you can put TRUE in the Change Password on First Login field. With this feature, one generic temporary password can be set for users and each user can create their own unique password at first login to the online platform.
Usernames can contain any combination of letters and numbers, and must be at least 4 characters long. Many schools choose to use an existing username or student ID which is easy for a student to remember.
 Tip: If your students will be logging in to VR headsets, we recommend making their usernames short and simple as they will have to type them in using an on-screen keyboard.
4. Click the Browse button and locate your CSV file, then click Next.
5. You will see a preview of your data.
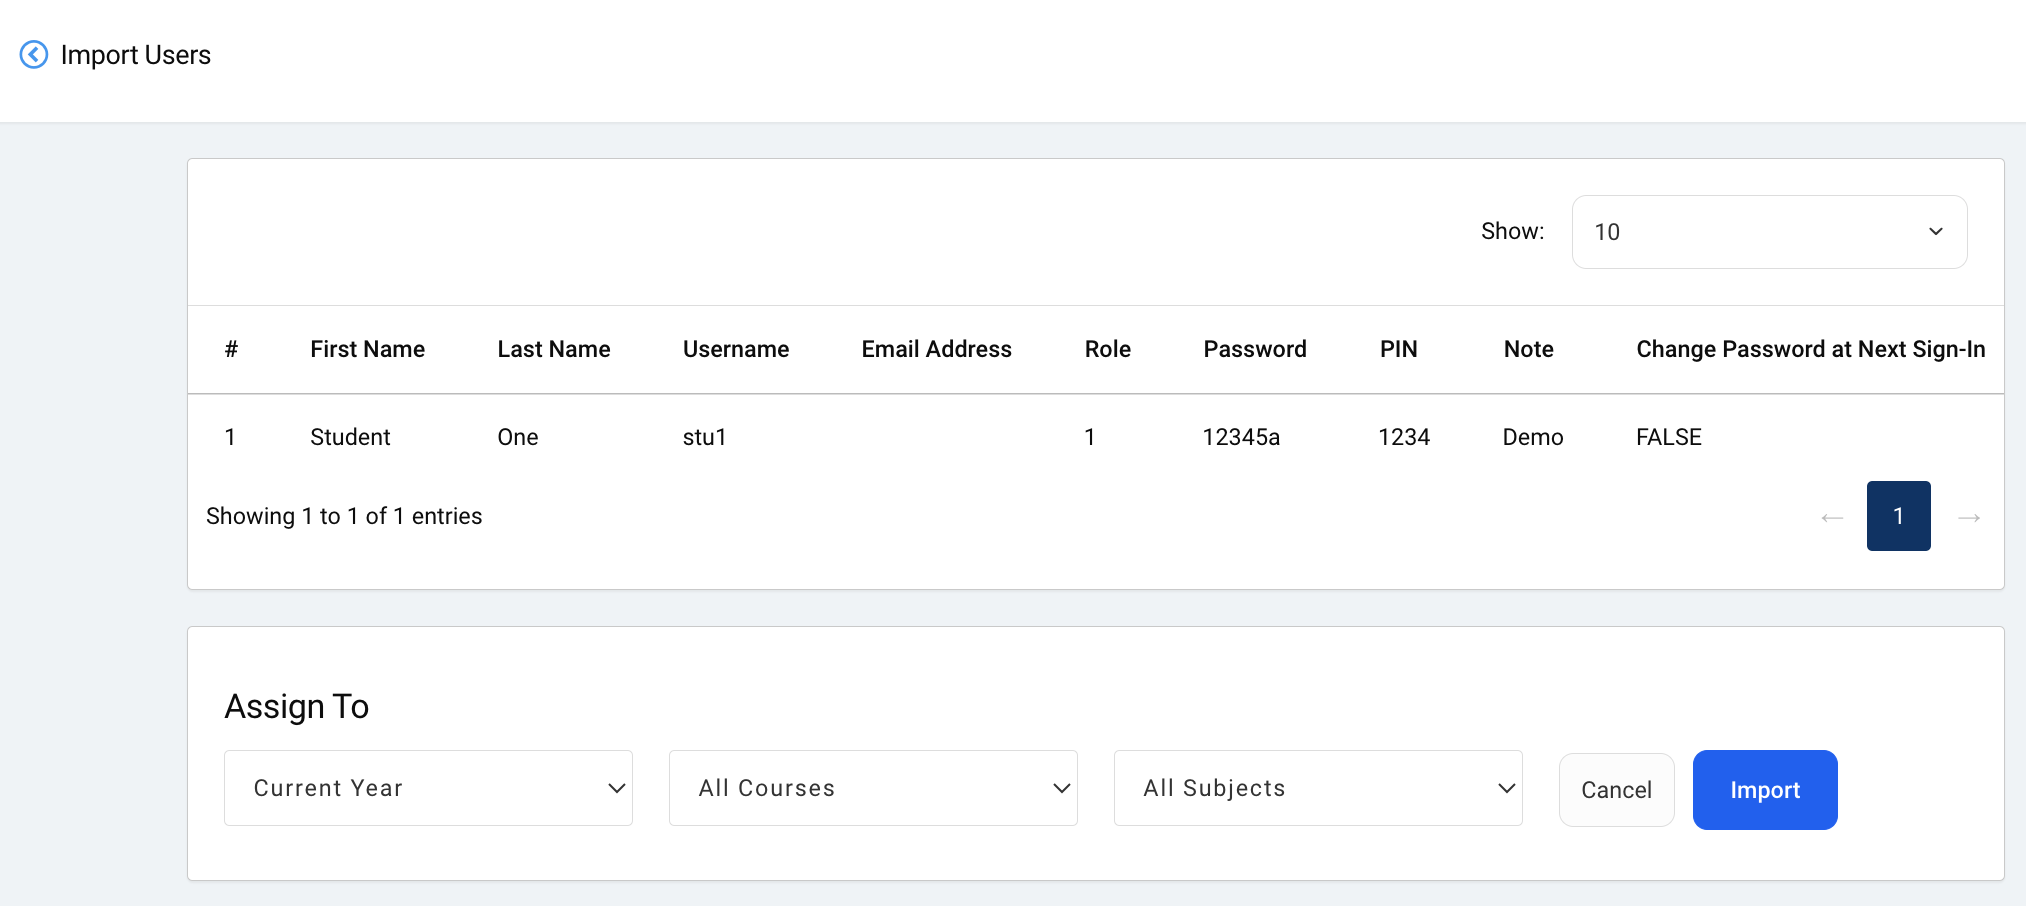
If all seems correct, click Import.
If all seems correct, click Import.
6. If there were any errors when importing your data, you will have the option to download a CSV file containing the users which were not successfully imported. Check your data and make sure everything follows the guidelines listed on the Import User page, then you can correct the information in that file and import those users.
7. Distribute the new credentials to your users and they can sign in!
Related Articles
Creating Users
As a School Admin, you can create a single user on the User Management page. You can also import multiple users. Click User Management to the left. Select Add User at the top right. Choose Create User from the dropdown menu. Fill out the details to ...Importing 360º Content into a UmakeVR Project
In your UmakeVR project, enter Editor Mode by double-tapping the spacebar. Next, open the iMenu by selecting the “i” in the lower right corner, or by double clicking your left mouse button. Now that you are in the iMenu, make sure you’re on the ...Add Interactive Media to UmakeVR
To add interactive content to a UmakeVR project, use the Media tab from the top when in editor mode. Add a Slideshow by choosing file types like photos, videos, or PDFs. Multiple files can be selected at the same time. After clicking Open, give your ...Resyncing the UmetyVR Headset
If you have added or removed student users, or updated any usernames and PINs, you'll need to update the local user information on the headset by syncing user profiles. Make sure your headset is connected to the internet. Select Settings in the ...How Do I Find the Student and Teacher Signup Codes?
If you are a student, ask your teacher for the student signup code. If you are a teacher, you can ask your Umety School Administrator for the teacher code. Teachers can log into their Umety account at app.umety.com and find the student signup code in ...